Carving Small Characters in Wood. Renee Mery
Чтение книги онлайн.
Читать онлайн книгу Carving Small Characters in Wood - Renee Mery страница 3
 stitch is embroidered like a backstitch but the needle is pushed through the left hole of the previous stitch to form a continuous line.
The stem stitch is embroidered from top to bottom. Bring the needle out below the embroidery line, reinsert the needle a little higher and bring it back out in the middle of the stitch, setting the floss to the right of the needle while following the outline.
Thread two plies of floss of different colors into the needle then embroider in the stem stitch by bringing the needle out between the two plies of floss. They can always be on the same side or move from one side to the other.
Embroider as if it were a stem stitch but bring the needle out in the middle of the floss used to separate the strands.
Embroider the first stem stitch then two overlock stitches by sliding the needle under this stitch. Embroider the stem stitch then the two overlock stitches by passing the needle under two consecutive points.
The stitch is embroidered in two steps: first the stem stitch line then an overlock stitch under each stitch with a different color floss, without stitching into the fabric.
Creation No. 1
Vase covers
Practice the running stitch
STITCH USED
Running stitch (see lesson on page)
SUPPLIES
× DMC milled cotton floss: green, turquoise, red, aqua green
× Recycled bottles
× White cotton canvas cloth
× HB pencil
× Erasable fabric marker
INSTRUCTIONS
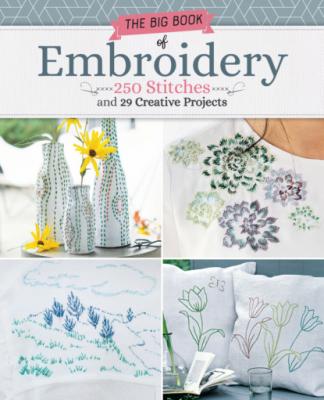
Collect bottles of different sizes. Trace their outline twice on a white cotton canvas with the pencil while paying attention to their thickness.
Using the erasable marker, draw the enlarged pattern freehand on both sides of the bottle cover, or trace it with carbon paper.
Embroider with running stitches using six strands of the DMC milled cotton floss. Vary the colors, taking inspiration from the photo. Erase the markings and iron the embroidery.
Cut the pieces out, leaving a ⅜" (1cm) border. Stitch them together, right sides facing, ⅜" (1cm) away from the edges. Press open the seams and turn right side out. Fit the cover on the bottle.
Creation No. 2
Simple tulip pillows
Practice the Point de Sable stitch.
STITCH USED
Point de Sable stitch (see lesson on page)
SUPPLIES
For each cushion
17¾" x 17¾" (45 X 45cm):
× DMC Pearl Cotton: 3864, 3348, and 3816 for the cushion with 3 tulips; 470, 318, 712, and 524 for the second cushion
× Special embroidery carbon paper
× Tracing paper
× Sewing kit
× 2 fabric squares of 18½" x 18½" (47 x 47cm)*
× Synthetic stuffing*
× Sewing thread*
× Sewing machine*
× (* or 2 cushions)
INSTRUCTIONS
Trace the diagrams.
Trace the tulip and the butterfly on one square (or a cushion), three tulips on the other.
Embroider each motif with two adjacent lines of Point de Sable stitches of the same color: 3864 or 3348 or 3816 for each of the three tulips, 470 for the tulip with the butterfly, 318, 712, and 524 for the butterfly.
To make the cushions: place an embroidered square and a blank square right sides facing. Sew a seam, ⅜" (1cm) from the edges, leaving an opening in the middle of one side. Turn right side out, iron. Fill with synthetic stuffing. Hand stitch the opening to close.
Creation No. 3
Elegant tea towels
Practice the stem stitch.
STITCH USED
Stem stitch (see lesson on page)
SUPPLIES
× DMC milled cotton floss: 2 skeins fuchsia pink 3805 and eggplant purple 3802
× Carbon paper
× 2 white linen tea towels
× 1 box textile dye for 9 oz (250g) of fabric, colors: baby pink 07 and lilac 02 (Dylon).
INSTRUCTIONS
Dye each towel according to the manufacturer’s instructions and add other pieces of cloth to achieve a dry weight of 12½ oz (350g) in order to lighten the shade.
Enlarge the embroidery design. Trace the design on the towel using the carbon paper (or a light table), being sure to center it.
Embroider using the stem stitch with six strands of purple for the pink tea towel or fuchsia for the lilac.